How Much Counter Space Does a Countertop Ice Maker Need?

You’re wondering how much counter space a countertop ice maker needs. Generally, you’ll need about 1 to 2 feet of clear countertop space for your ice maker. This accounts for its physical size and the space needed for air circulation and easy access.
Beyond just the footprint, consider its operational needs. Some models require space above for water reservoirs or venting. Thinking about a convenient location with access to an outlet is also key. You want it handy, but not in the way of your daily kitchen tasks.
TL;DR:
- Countertop ice makers need 1-2 feet of space.
- Allow for air circulation around the unit.
- Ensure easy access for filling and emptying.
- Proximity to a power outlet is essential.
- Consider vertical space for some models.
Let’s break down the space requirements so you can find the perfect spot for your new ice maker.
Finding the Right Spot for Your Countertop Ice Maker
So, you’ve decided a countertop ice maker is for you. Great choice! But before you hit ‘buy,’ let’s talk about where it’s actually going to live in your kitchen. Getting the location right is key to enjoying your nugget ice, bullet ice, or whatever your ice maker churns out, without adding clutter or frustration to your daily routine.
We know the biggest question is: “How much counter space does this thing really need?” The general rule of thumb is to set aside about 1 to 2 feet of clear countertop space. This isn’t just for the machine’s footprint, though. You also need to account for airflow and how you’ll actually use it.
Understanding the Physical Footprint and Beyond
The Actual Size of the Ice Maker
First things first, let’s look at the machine itself. Countertop ice makers vary in size, just like refrigerators. Some are quite compact, designed to fit snugly where a toaster might live. Others are a bit chunkier, especially those that can produce a lot of ice quickly or have built-in water reservoirs.
You’ll want to measure your available counter space. Check the dimensions listed on the product specifications. Don’t just look at the width; also note the depth and height. This helps you visualize how it will sit without looking like a squeezed-in guest.
Space for Air Circulation: It’s Like a Tiny Breath of Fresh Air
This is where many people overlook a critical detail. Your ice maker needs room to breathe! Most countertop ice makers generate heat as part of their cooling process. They also rely on air circulation to function efficiently and prevent overheating.
Manufacturers typically recommend leaving a certain amount of space around the unit. This often means about 4-6 inches of clearance on the sides and at the back. Some models might need even more. Think of it like giving your car engine room to cool down; it prevents strain and helps the machine last longer.
We found that units packed too tightly often work harder, taking longer to make ice and potentially shortening their lifespan. So, that 1-2 feet of space we mentioned earlier? That’s really a guideline that includes this vital breathing room. You don’t want to shove it right up against the backsplash or a tall appliance.
Clearance for Lids and Doors: Access Granted
How do you get ice out? How do you add water? Most countertop ice makers have lids that lift up or doors that swing open. You need enough space to comfortably do this. Imagine trying to scoop ice when the lid only opens halfway because it’s hitting a cabinet above!
For models with top-opening lids, make sure you have enough vertical clearance. Measure the height of the machine and add the amount the lid opens. You don’t want to be ducking or struggling to access the ice basket. Many experts say this is a common oversight that leads to frustration.
Considering Operational Needs and Convenience
The Power Source: A Close Connection is Key
Every countertop ice maker needs electricity. This means you’ll need to place it reasonably close to a power outlet. While extension cords can be used, they’re often discouraged for appliances that draw significant power, and they can be a tripping hazard.
Ideally, you want a dedicated outlet nearby. If your closest outlet is already crowded with other kitchen gadgets, you might need to rethink the location or get a power strip with sufficient capacity. We’ve found that keeping the power cord tidy and out of the way also contributes to a cleaner look and safer kitchen.
Water Source: How You Fill It Matters
This is a big one, and it varies by ice maker type. Some countertop models have small, built-in water reservoirs you fill manually with a pitcher or jug. Others might have a connection for a direct water line, similar to a refrigerator ice maker.
Manual Fill Models: If you have a manual fill model, you’ll need easy access to carry water to it. Placing it near the sink can be a lifesaver. Trying to lug a heavy pitcher of water across a crowded kitchen can be a recipe for spills. You’ll also need space to open the lid or reservoir to pour the water in.
Direct Water Line Models: If your unit has a direct water line hookup, the installation itself will dictate placement. You’ll need to be near a water supply and a drain (though some drain pumps can push water further). While these offer ultimate convenience, they require a bit more planning and might involve a plumber. The space needed for the machine itself remains similar, but the surrounding area needs to accommodate the water line connections.
Drainage: Where Does the Water Go?
When you empty your ice maker or if it has a self-cleaning cycle, water needs to go somewhere. Most manual fill models have a drain plug at the bottom. You’ll need to place a container or bucket underneath to catch the water when you empty it. You’ll need space to manage drainage when emptying the ice maker.
This means you need enough clearance at the bottom to comfortably fit a small basin or tray. If you have a model with a drain pump, it might be able to pump water into a nearby sink, which simplifies things but still requires proximity to a drain point.
Putting It All Together: Your Ice Maker Checklist
To help you visualize the perfect spot, let’s run through a quick checklist. Think about these points as you scout your kitchen.
- Is there at least 1-2 feet of clear countertop space available?
- Can you leave 4-6 inches of space on the sides and back for ventilation?
- Is there enough height clearance for the lid to open fully?
- Is a power outlet nearby and accessible?
- Can you easily access the unit to fill it with water (and is it near the sink if needed)?
- Is there space below or nearby to manage drainage?
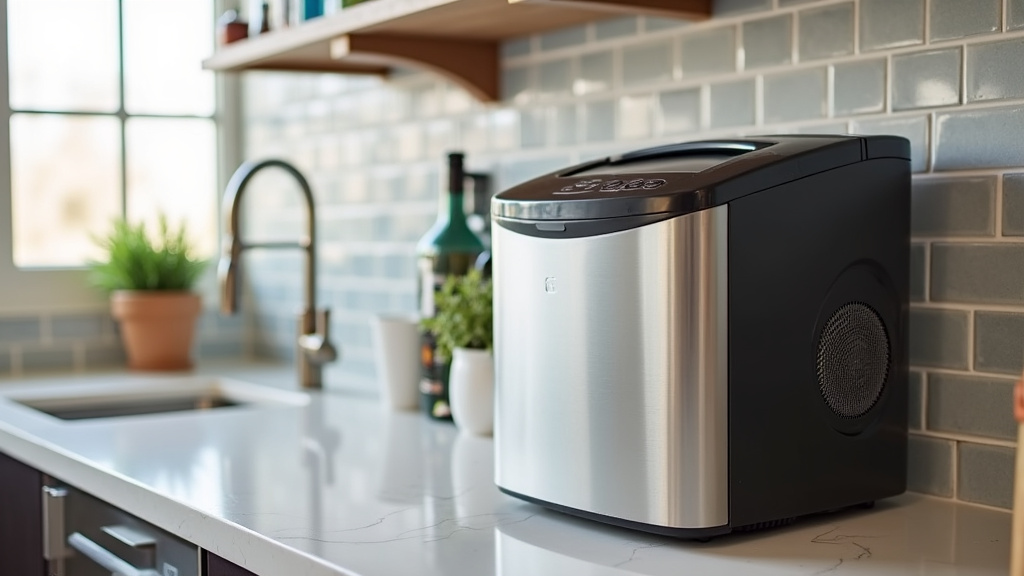
Comparing Space Needs: A Quick Look
Not all ice makers are created equal. Here’s a general idea of how different types might influence your space considerations, though always check the specific product dimensions!
| Type of Ice Maker | Typical Footprint (Approx.) | Key Space Considerations |
|---|---|---|
| Compact Manual Fill | 12″W x 15″D | Lid opening height, easy pitcher access to sink. |
| Standard Manual Fill | 14″W x 17″D | Good ventilation (4-6″ sides/back), lid height, drainage. |
| High-Capacity / Direct Line | 16″W x 18″D | Ventilation, lid height, water line hookups, potential drain pump space. |
As you can see, the actual machine size is just one piece of the puzzle. Thinking about how you’ll use it daily is just as important for ensuring it fits well into your kitchen workflow.
Where NOT to Put Your Ice Maker
To make things even clearer, let’s talk about places to avoid. You wouldn’t put a plant in a dark closet, right? Your ice maker has similar needs.
- Direct Sunlight: This can overheat the unit and make it less efficient. The sun’s rays can also degrade plastic parts over time.
- Near Heat Sources: Keep it away from ovens, toasters, or radiators. Extra heat makes the ice maker work overtime.
- In Enclosed Cabinets: Unless the cabinet is specifically designed with ventilation, this is a no-go. It traps heat and prevents airflow.
- On Uneven Surfaces: This can cause vibrations and make the machine noisy. It also affects proper drainage.
Many home chefs and appliance reviewers agree that proper placement is key to enjoying your ice maker’s benefits without any fuss. Finding that sweet spot ensures it’s always ready to serve up fresh ice.
Conclusion
Finding the right spot for your countertop ice maker is more than just fitting it onto your counter. You need to account for its physical size, but also essential clearance for airflow and user access. Think about how you’ll fill it with water, manage drainage, and plug it in. By considering these operational needs alongside the machine’s dimensions, you ensure your ice maker runs efficiently and becomes a convenient addition to your kitchen.
Take a moment to measure your space and review the checklist we provided. This simple step will help you choose the perfect location and avoid common placement mistakes, so you can enjoy fresh ice without hassle.
Frequently Asked Questions
How much space do I *really* need around my ice maker?
You’ll generally want about 4-6 inches of clearance on the sides and back. This allows for proper air circulation, which is vital for keeping the machine from overheating and working efficiently. Ignoring this can make your ice maker work harder and potentially shorten its lifespan.
Do I need to worry about the height of the ice maker lid?
Yes, you absolutely should! If your ice maker has a top-opening lid, you need enough vertical space for it to open completely. Measure the machine’s height and add the height the lid opens to ensure you won’t be struggling to scoop ice or add water.
Can I place my ice maker in a cabinet?
Generally, no, unless the cabinet is specifically designed with built-in ventilation. Most cabinets trap heat and prevent the necessary airflow, causing the ice maker to overheat and perform poorly. Keep it out in the open on your countertop.
What’s the best spot if I have a manual fill ice maker?
For manual fill models, placing your ice maker relatively close to your sink is ideal. This makes it much easier and less messy to carry water to the unit using a pitcher. You’ll also need space to comfortably open the lid or reservoir to pour the water in.
Are there any places I should definitely avoid putting my ice maker?
You should avoid placing your ice maker in direct sunlight or near other heat sources like ovens or toasters, as this makes the unit work harder. Also, steer clear of enclosed spaces that block airflow and uneven surfaces that can cause noise and drainage issues.